2 days ago
Wednesday, December 30, 2009
"Tool Bag"
This started out in my head as a camera bag, which is why I used thick batting....however, the shape was all wrong for my big camera, so I decided to turn it into a scissor/cutter bag for my rotary cutters and scissors. I do have another organizer for them, but this way they are wrapped up tight and away from my busy little boy!
Tuesday, December 29, 2009
Toddler blanket
I found the little monkey fabric today (I had planned to use something else), but fell in love with the monkeys! The backside is soft minky, nice and cuddly. I am in the works of making one for my son who requested a new soft blanket (if you could see the scraggly, thread-bare blanket he has had since birth that goes everywhere, you would know why he needs a new one!). I think I will make his smaller though. Hopefully it will be ready for his birthday in a few days....fingers crossed!
I had to fix it....
....I don't mind keeping ugly scrapbook pages that don't turn out so well....but at $23 a metre, I had to un-stitch and figure this out!! Now I have the blue fabric as the lining and quilt batting on BOTH sides! I added some 1" grossgrain SU ribbon as well just to keep the top closed....And luckily my laptop still fits inside even after the alterations!
Monday, December 28, 2009
Tree Skirt
This project is not finished and should have been posted after the post below....But in light of my "lap-top cover" failure, I wanted to post another project I am working on. I am very happy with it, although it didn't get finished in time for Christmas, I am OK with that! The diamonds are only pinned together, but I will get this finished soon....well, before next Christmas for sure!!
My lap top cover disaster!
This is what I get for sewing without either one of my sewing experts available (Mom or Colleen)!!!
This was supposed to be the flower fabric on the outside, lined with the blue and batting in between....However it ended up being flowers on the front, blue on the back and both layers of batting on the front side!!!! Back to the drawing board...and no more trying to design my own projects, this isn't as easy as paper-crafting!!
Sunday, December 27, 2009
Holiday 6x6 Scrapbook
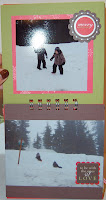
My little guy was very sick on Christmas Day, and was asleep for most of it.....what to do?? I decided to make a mini scrapbook for my 2 nephews to document our trip up Grouse Mountain a few days before. It is pretty simple (remember it was spur of the moment-had to be done by the time we left for dinner at 3!!)
I used a lot of leftovers from a Christmas Simply Scrappin' Kit (SU) fome last year, plus current DSP and punches.
Wednesday, December 23, 2009
Chocolate tags
I made these tags for my sister-in-law to put on the gifts for her clients. She is a graphic designer and I used her business card which she of course designed!) and cut out her logo with my SU paper snips. I then cut out the tag using my Big-shot and the Sizzix Two Tags Die which I stamped with Serene Snowflakes and Versa mark, then used one of the Sale-A-Bration sets from last year for the inside, and my SU markers....
Tea cozy
I made this tea cozy using my favorite...."Figgy Pudding" by Basic Grey...fabric. I can't get enough of this stuff, needless to say, by next year all of my Christmas "stuff" will be finished in this fabric. I have my tree skirt almost finished, I just need to do the binding....stockings and table runner is cut, but clearly won't be finished by Christmas....next year though*sigh*!!
I used the wide striped ribbon (from the Christmas mini last year) for the ties instead of making the straps. You can't see it, but I did a small zig-zag stitch to attach the ribbon to the fabric....one at the top and one at the bottom. I am going to add elastic to make it scrunch better, but have yet to do that!
Saturday, December 19, 2009
HoHoHo Chipboard
Wednesday, December 16, 2009
My masterpiece....
.....is finished! I am very happy with it. Some of the squares could have been better placed, but it wasn't as easy as I thought trying to remember that the "bad" side is actually the "good" side!!
Cutting the fringes took a few hours and I am still cleaning up strings, but I love it and it is soooooo cozy!
Tuesday, December 8, 2009
Chocolate box
Friday, December 4, 2009
Black and White thank-you.....
Wednesday, December 2, 2009
More bleaching....
Tuesday, December 1, 2009
Reinder Gift Bags
I will be sad when Christmas is over...I have been making cards and doing Christmas projects since September, they are so fun!!
I saw this Reindeer on Angie's blog (Chic n Scratch). She used the Tulipe die for the antlers so her's looks much better, I don't have that one, so I used one of my flower/stems die (sizzix, but not SU) I tried the snowflake punch as well, but this looked better. The box is a 2-4-6-8 box, wheeled with the star wheel. This size was just perfect for holding some yummy Creative Nail Design lotions that I have for little gifts. The wire I found in the "wire" isle at Home Depot and I wrapped it around a pencil to make it curly. I will be making a few more of these before the holiday is done!
Monday, November 30, 2009
Watercoloring
For this card I used the set "Summer By the Sea" (SU retired). I embossed the image and then watercolored using my crayons, pencils, and blender pen (all SU). I added the white organza with a button tied with some linen thread to finish it off.
Labels:
Birthday,
card,
techniques,
watercolor crayons,
watercoloring
Saturday, November 21, 2009
Pointsetta
Thursday, November 19, 2009
Christmas countdown
This project was so easy...the hardest part was getting that oval on straight (which I clearly failed at!!) This is from SU's Decor Elements line, I cut out cardstock and decorated them with the numbers and different things (ribbons, punches, etc). I didn't want one of those Advent calanders with the chocolate this year because my 3 yr old just wants to open them all at once!
I put velcro dots on the back of the number pieces so they can easily be changed each day.
Wednesday, November 18, 2009
Rag Quilt Purse
I got the pattern for this purse from Angie over at Chick'n'scratch.com. She has been making a bunch of these purses. The squares are cut out with square scallop die using my Big shot. I then added the batting in between to squares and quilted each square, then sewed it all together. I think it will make a great b-day gift for my favorite little niece. It might be a cute lunch bag too?!
Tuesday, November 17, 2009
My latest obsession is...
Saturday, November 14, 2009
Playing with re-inkers
Not usually colors I use, but I thought I better learn to like the in-colors since I have a ton of paper and ink! I used the medallion background stamp and used the dazzle versamark on the crushed curry layer. Using a baby wipe I squirted the re-inkers Bermuda Bay and Crushed Curry, (I also used a tiny bit of Pacific point, but it is barely visable) I inked up my medallioin stamp and stamped it twice on whisper white, then cut out the strip you see.
Tuesday, November 10, 2009
More BAB (Build A Bear)
This card is for my friend's daughter's birthday (that I designed the invites for). She had a party where she asked that instead of gifts, people make donations to the OWL Wildlife fund. (She turned 9-how unselfish is that??!!) They came and brought some owls and did a presentation.
Anyways, back to the card....I used choc. chip for the base, very vanilla, embossed with the star CB folder, then the BAB with girl accessories. I cut out the owl and put some big glow-in-the-dark googly eyes so it could look like it ws landing on her hand. Inside, I made a little pocket to hold the donation.
Monday, November 2, 2009
Bleaching
I wanted to try "coloring" using bleach, but don't have many watercolor sets. This is a retired set called On Angels Wings. I stamped her in black craft ink and embossed her. Then using my aqua painter (empty) I just dipped in in some bleach and colored the areas I wanted white. Super easy technique but very effective. I also used the sanded stamp in the background
Sunday, November 1, 2009
I know I have been neglecting my blog!!!
I have recently been inspired to give quilting another attempt and have been sewing up a storm....not leaving me much time for cards!! But I did design these invitations for my friend's daughters' birthday invites this week. I think the colors are fabulous and they turned out so cute. The party is on a ranch with horses so this Wanted set was perfect. On each of the modern labels, she will hand write each childs name.
Thursday, October 22, 2009
Ornament punch crazy!
This punch makes Christmas cards so easy! I saw someone do this technique with the movers and shapers die (to overlap them on the card....so I used the ornament punch and cut out overlapping images on the front of the card, then cut out 2 ornaments out of DSP and put them on the inside. I overlapped the wide oval, scallop oval and modern label punches for the greeting and popped it up on dimensionals. I also stamped the front of the card with a snowflake in versa mark.
Monday, October 19, 2009
Pun Fun
I love this set (pun Fun), but I hadn't used it yet. So, since I just got my new Water Color Crayons (SU), I thought I would give watercoloring another try. Coloring with these crayons is really my favorite way to color so far, they blend really nicely. I added some crystal effects on the whale card, to like like water and on his blow spout. (Click on picture to enlarge image)
Saturday, October 17, 2009
Polar Bear
I saw the idea of doing a "white" bear with a snow suit on Splitcoaststampers.com...I tried to fit quite a lot on a small card, but in the end I am ok with the result. You have to click on the pic for the details.....I stamped the Bear's shirt....tied his laces...and i created the toque out of punches....(the trio flower, wide oval and free hand bottom....)
I realized after I uploaded the pic that I forgot to do his mouth in black as I had intended to do, but I wasn't going to fix it!!
Friday, October 16, 2009
Birthday bear
I really thought that I wanted nothing to do with these Build-a-Bear sizzix dies, but I ended up ordering all of them (mainly because I think I own everything else in the catalog!!)
I am really happy with the way she turned out. The base is really rust, and I made her dress out of Bella Rose DSP and old olive accessories. That is a gift bag in her hand that I made using punches, and of course I had to add a little bling to her outfit!
Saturday, October 10, 2009
Extreme dirtbike....
Friday, October 9, 2009
Little Monkies
I had to make 3 kid's birthday cards this weekend and I was having trouble getting creative so this is a very simple layout and I just made 2 of the same! The third one I did do different as he is a big boy (turning 5 years old!) See tomorrows post...
Anyways, back to these cards....I used the Sock Monkey set which I find perfect for kid's cards. I stamped it onto the circle (cut with bigshot) in basic black, then again in black on the DSP (that is choc. chip DSP). I cut out the DSP image and paper pieced the monkey. Added the birthday hat and chipboard which I inked with craft bashful blue ink which I added some dazzling diamonds to, as well as the pompom on the hat. Mounted the circle onto the scallop circle and then glued that with dimensionals to pop it up to the real red base. On the inside I put a piece of whisper white CS and stamped "celebrate" from the Warm Words set.
Thursday, October 8, 2009
Wednesday, October 7, 2009
Happy Thanksgiving....
This is kind of similar to a Christmas layout that I did. I used the Leaves #2 die (sizzix), and cut them out of the DSP then punched a hole and tied them on with gold elastic cord. I used Perfect Plum, and real Red cardstock, and stamped the greeting in plum and used my Soft Suede pen to color the flower (on vanilla CS), then punched it out with the key tab punch and popped it up with dimensionals. Lastly I spritzed the hole card with a mixture of rubbing alcohol and the platinum shimmer paint (from the Christmas mini catalog) that I mixed up in a small spray bottle.
Sunday, October 4, 2009
Tags
Saturday, October 3, 2009
BOO!!
How cute is this card?? I saw the idea on Heather Summers blog, switched it up a bit to make mine. I wasn't sure what to do with the new treat cups from SU, but this worked perfectly.
Paper: Cast-a- Spell DSP, basic black, perfect plum
Accessories: Big Shot, Serif Essentials Alphabet, Treat Cups, 1 3/4 circle punch, basic blac 1/4 ribbon, M&M's!
Paper: Cast-a- Spell DSP, basic black, perfect plum
Accessories: Big Shot, Serif Essentials Alphabet, Treat Cups, 1 3/4 circle punch, basic blac 1/4 ribbon, M&M's!
Friday, October 2, 2009
First Haircut
The DSP I used is retired, Junior Varsity. Old olive, so saffron and bashful blue CS for the background and flowers. I also added matching brads to the flower centers and used the modern label punch for the caption. The ribbon is bashful blue taffeta, and a tiny bit of 1/4 inch whisper white tied around the scallop envelope (sizzix die), closed with a silver flower brad
Subscribe to:
Posts (Atom)